
|
You can write the question in a free form
|
Short user manual for telepresence robot unboxing and launch
Quick Start
Attention! This is a QUICK start. A detailed description can be found in the following chapters below.
1) Unbox and assemble the robot: Unboxing.html.
Caution! Do not tilt the robot head and do not rotate the wheels by hand. There is a worm gear.
Caution! Find the microphone hole in your gadget and try not to close it with the tablet holders.
2) Press the big button on the robot cover to turn robot power On.
3) To use the robot, you need two gadgets (computers): one for robot "head" and other to control the robot remotely, see picture below. You can use Android, iOS or Windows-based devices.
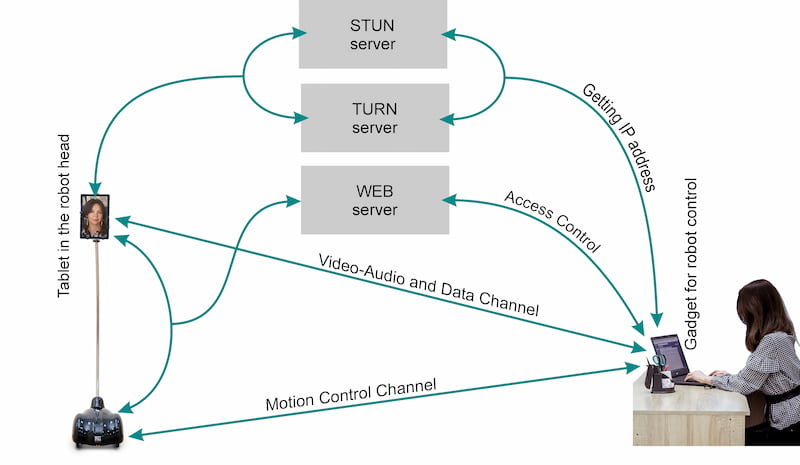
Tablet in the robot head and computer for the remote robot control
4) In the gadget for remote robot control you need to do the next (in details see here):
- download BotEyesWiFi application from Microsoft Store (for Windows users) or from Play Market (for Android users), or App Store (for iOS users), see application logo below. You need to accept all the permissions for this app during installation to make it work;
BotEyesWiFi application icon
- look for «AJ_SoftApSsid...» access point in the list of available networks of your gadget. This is the BotEyes robot access point and it can be seen in about 3 minutes after you turn the robot On. Connect your gadget to this access point using password "p@ssw0rd" (in details see here);
- connect your robot to your home/office WiFi access point using BotEyesWiFi application, see guide on the application screen. After that you can disconnect your gadget from «AJ_SoftApSsid...» and connect it to your home/office network;
- enter website https://boteyes.com/login using Default Login "NXX" (write it without quotes), where XX is the number written on your robot chassis, for example, N30, and password "1", see picture below. (Attention! https is mandatory. Do not use http without "s"!).
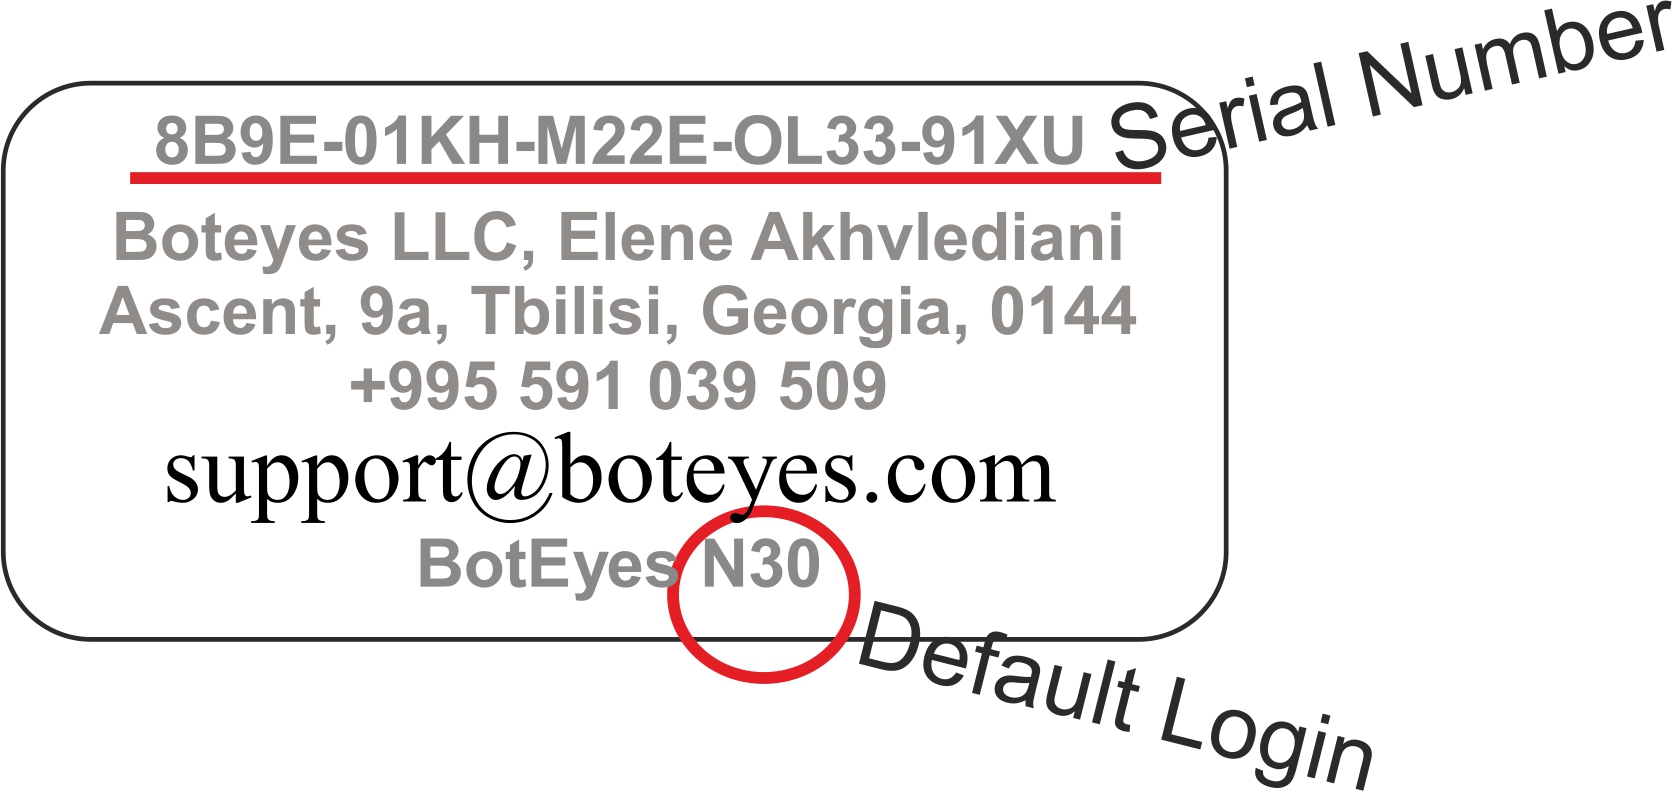
Robot label example, see the bottom of robot body
You must use the only supported browsers.
- you must agree with all the permissions that the browser will ask you. If you don’t agree, you will not be able to control the robot;
- now you will see the robot control circle. If mouse pointer is placed on the top part of control circle, robot goes ahead, if on bottom part, it goes backward and if on left or right part, then robot is turned around. The farther from center, the faster robot goes.
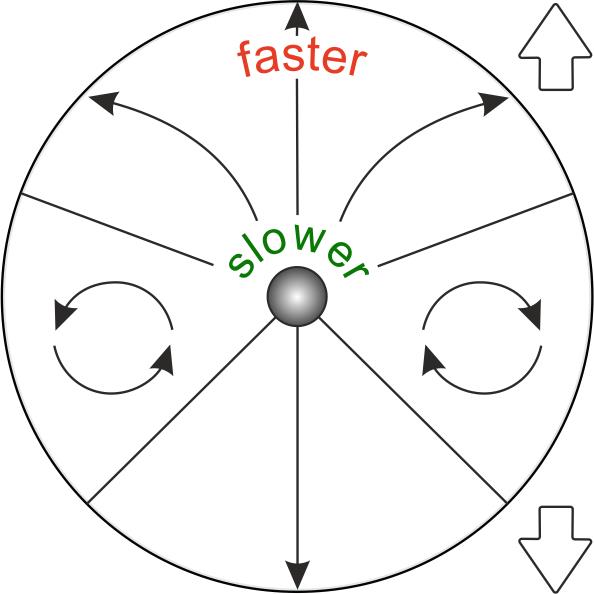
Robot control circle
5) The next things you need to do in the tablet for the robot head:
- install your tablet in the tablet holder, how to do that see here (your tablet must have the Google Android OS or iOS, or Windows,
not third party clones). Install any supported browser (see table above, but Chrome or Edge will be the best) and enter the same Login page using the same login and
password like above;
- after entering the website, press the gear image (it is the "Settings" button) in the left bottom part of the page, then press second "gear" button and in the opened "Settings" page check "Yes" in the string "Is this tablet
installed on the robot?" (see picture below). After that your browser address string changes to https://boteyes.com/RobotSide.html;
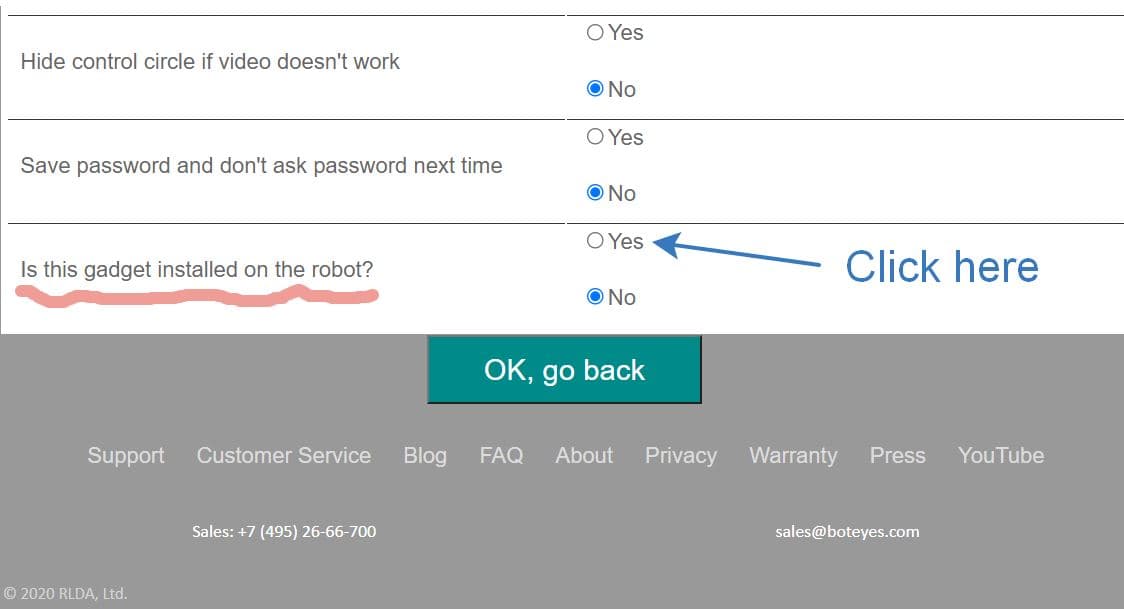
Settings for the tablet in the robot head
6) Go again to your gadget for the robot control:
- press the green button on the browser page appearing after login (it is https://boteyes.com/Client.html page). You will see video that goes from tablet in the robot head;
- now you can drive the robot and see the video from tablet in robot head.
7) If you have any problem, read, please, remain part of this User Manual or ask sales@boteyes.com.
8) To turn robot off, press big button on the robot cover and hold it pressed until the green led turns off. One minute late red led and robot turns off.
9) For BotEyes-Mini see instruction here: BotEyes-Mini difference
10) More detailed description of the steps above you can see in the next chapters of this website.
The detailed description see here


